Create a Polaris service account
Learn how to create a service account in the Polaris user interface.
To create a service account in the Polaris user interface, follow these steps:
Note: Only Organization Administrators can complete these steps.
-
Assign the service account a global or application-level role.
To assign the service account a global role, follow these steps:
- Under Role type, select Global (all applications).
- Select Organization Administrator or Application Manager using the Role dropdown.
To assign the service account an application-level role, follow these steps:-
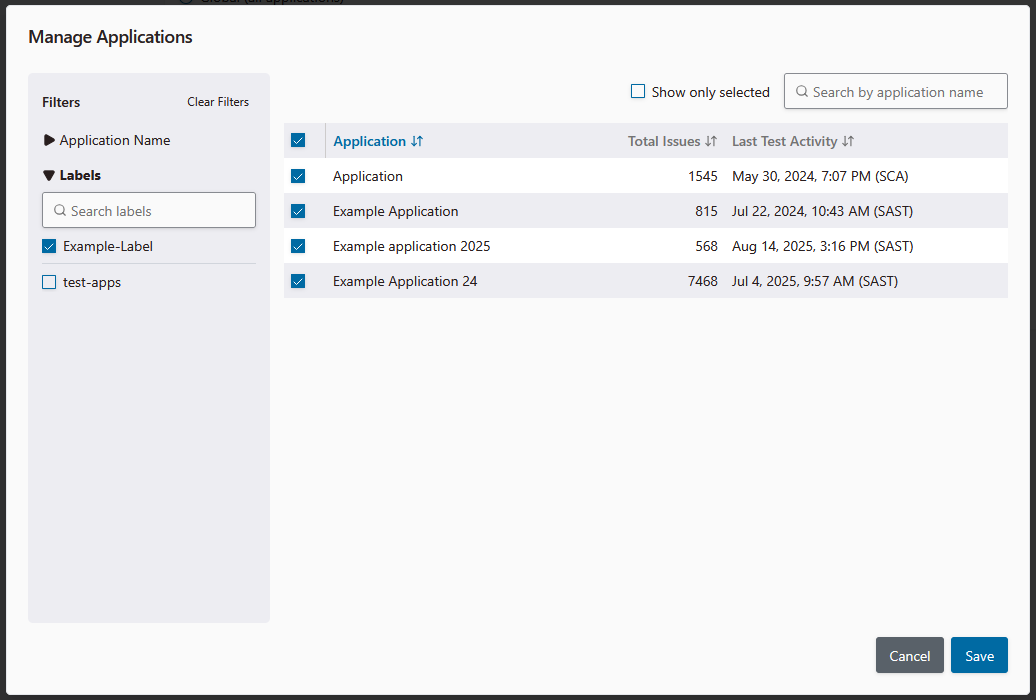
Select the applications you wish to grant the service account access to using the checkboxes on the left side of the table.
Tip: Use the Application Name or Labels filters to quickly find applications in your portfolio.
-
Select Save.
The Create Service Account window appears. The service account's token is listed in the Access Token field.
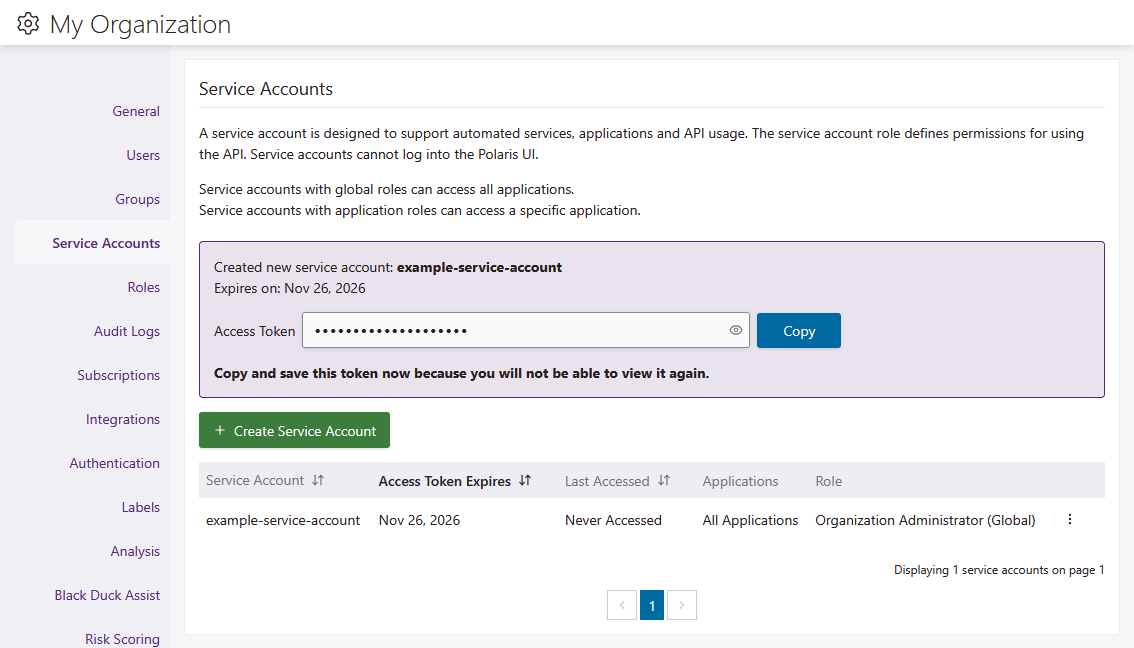
Note: The token is obfuscated, by default. Select the show icon to view the token in plain text.