Integrate a GitHub Repository (Cloud-hosted)
How to integrate a single GitHub or GitHub Enterprise (Cloud) repository into a project.
Note: The Black Duck Security Scan Action is the preferred method for
integrating the GitHub pipeline with Polaris.
For information about bulk integration, see Integrate Multiple SCM Repositories.
Steps for Integrating a GitHub Repository (Cloud-hosted) to a Project
- From Application, select a Project and navigate to Settings > Integrations.
- Select Cloud-hosted.
- Select the source of your repository: GitHub or GitHub Enterprise.
- Enter the Repository URL. To obtain the repository 's URL, open your repository, click the Code button, and copy the HTTPS URL (SSH is not supported).
Figure 1. GitHub example 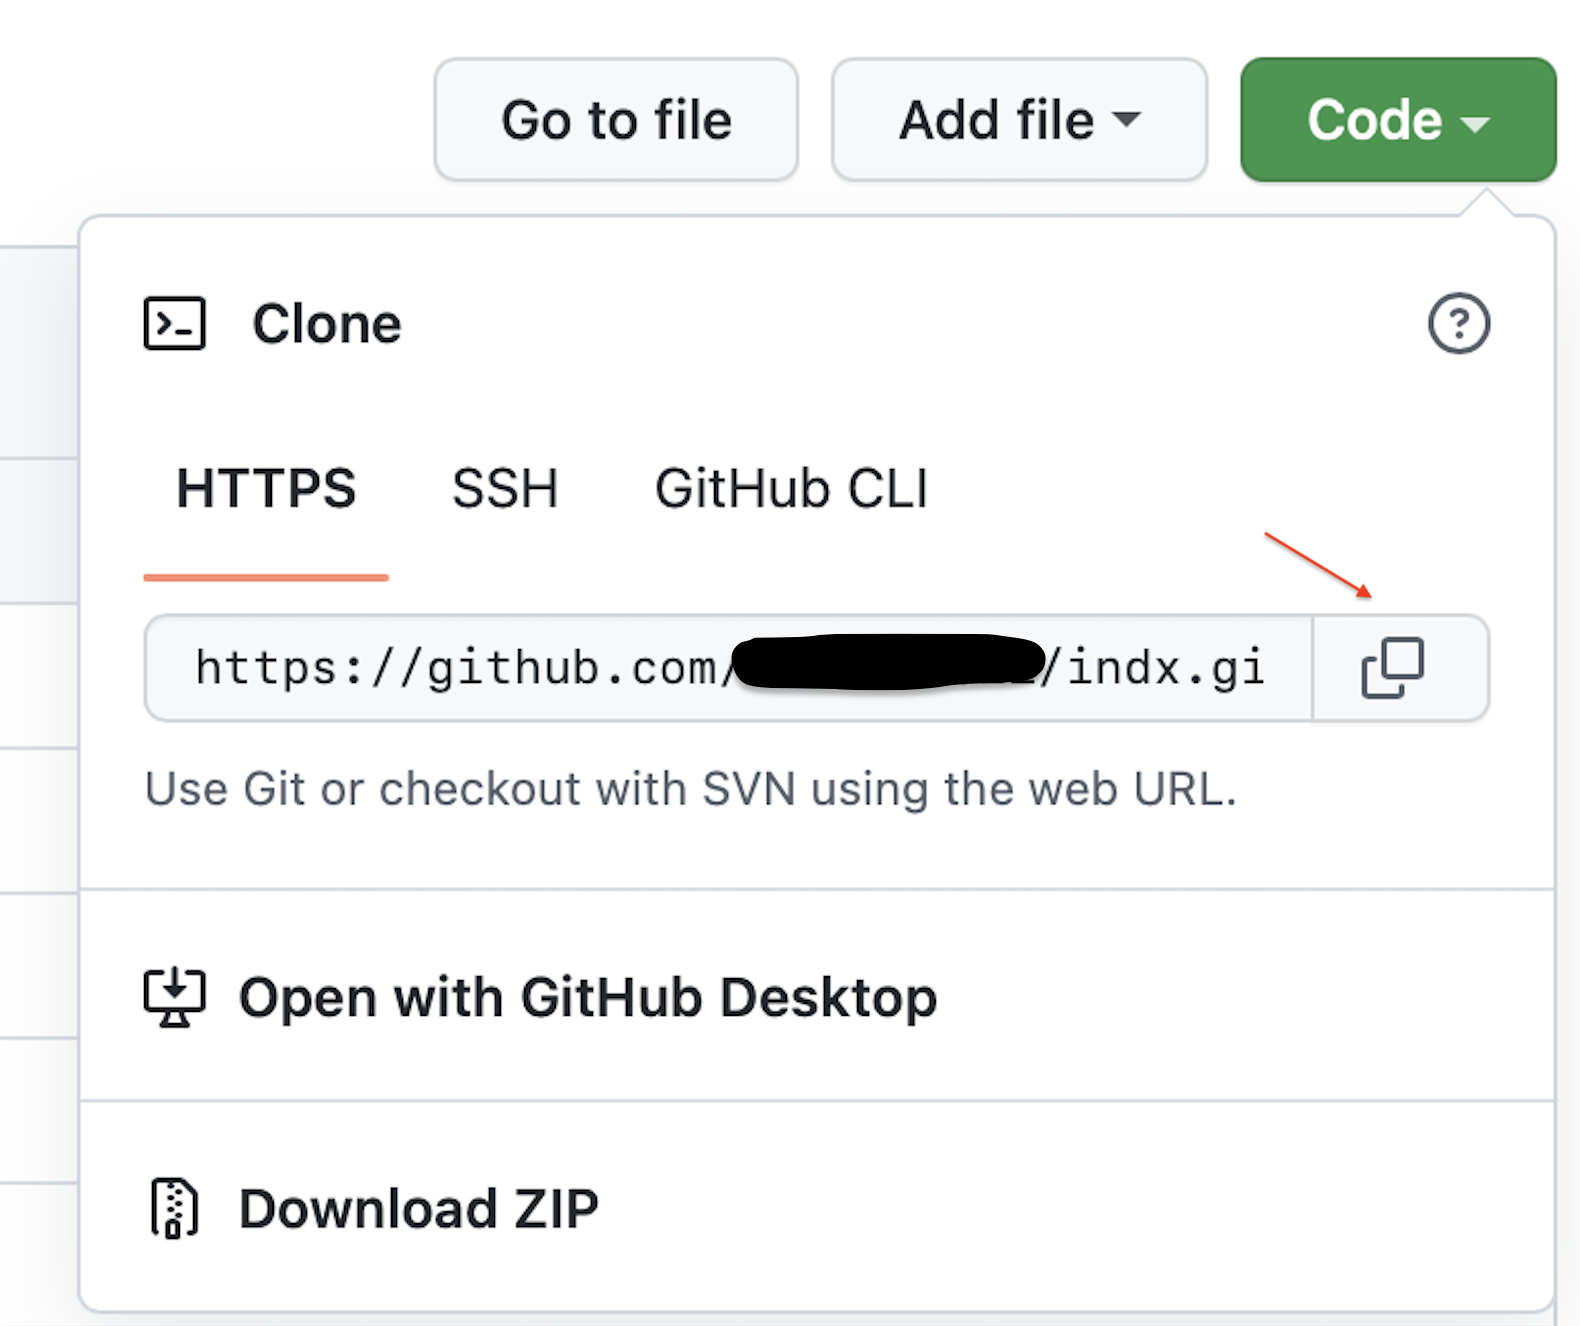
- Enter the Repository Access Token. Generate an access token in GitHub, and then paste it into the text field.Note: Due to security reasons, if you change any of your repository settings, you will have to enter the Access Token again.
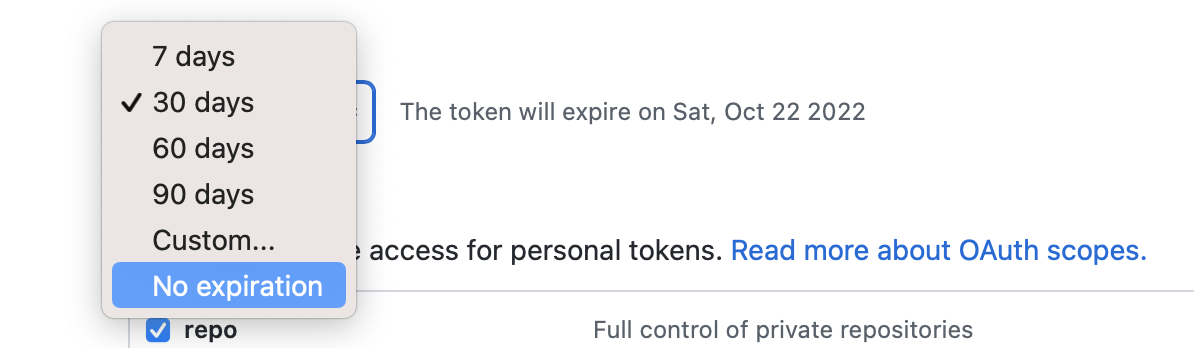
When creating an access token:
- Set the token's expiration date. To avoid issues, we recommend
setting the token to No expiration.
- Under Select scopes, access to
repo is required.

Important: To use the event-based test automation feature or synchronize the repository with Polaris, the token you use requires additional scopes: read:org (under admin:org), and admin:org_hook. See Event-Based Test Automation in Polaris for SCM Integrations (needed for pull request comments) and Synchronizing Polaris with your SCM Provider for more information.Note: For more information on creating access tokens, see the GitHub documentation. - Set the token's expiration date. To avoid issues, we recommend
setting the token to No expiration.
- Click Test your Connection. A spinning circle indicates the test is in progress.
-
If your connection test is unsuccessful, check the following and retry:
- Your network connection is stable.
- Check the Repository URL and Access Token to make sure they are accurate.
- Check that the Repository Access Token is still valid and has not expired.
- Check that you selected the correct provider for your source repository.
- If your connection is successful, click Save.
You can now scan on demand (see How to test from the web UI) or schedule automatic testing on a
daily or weekly basis (see Test scheduling policies).
Note:
From the Tests screen, test the connection before
beginning a test manually.