Ways to triage issues in Polaris

In the issue list you can triage issues in several ways:

  • Triage individual issues
  • Batch triage by manually selecting multiple issues
  • Batch triage by filtering
  • Triage all

You'll need to use all of these, so we explain each approach in this page.

Note the following when triaging issues:

  • If the same issue is detected in multiple branches of a project, you only need to triage it once. Triage actions (which can include setting or changing fix-by dates) are automatically applied across branches in a project.
    Important: Duplicate SCA issues may appear in the issues table. This occurs when the same issue is captured in separate package manager and signature analysis tests of the same branch. Duplicate SCA issues must be triaged separately.
  • Component triage (see Ways to triage components in Polaris) can affect your results.
    • When you exclude a component, any non-dismissed issues derived from the component are automatically dismissed.
    • When you include a component, any issues related to the component that has been previously dismissed automatically, are now set to the default state (not triaged).
      Note: View components excluded on the Issues page by going to Filters > Triage Status > Dismissed > Components Excluded.
  • Dismissed issues and excluded components (via issue and component triage) are not included in reports and dashboards. It can take up to 60 minutes triage actions to affect reports and dashboards.

Triage individual issues

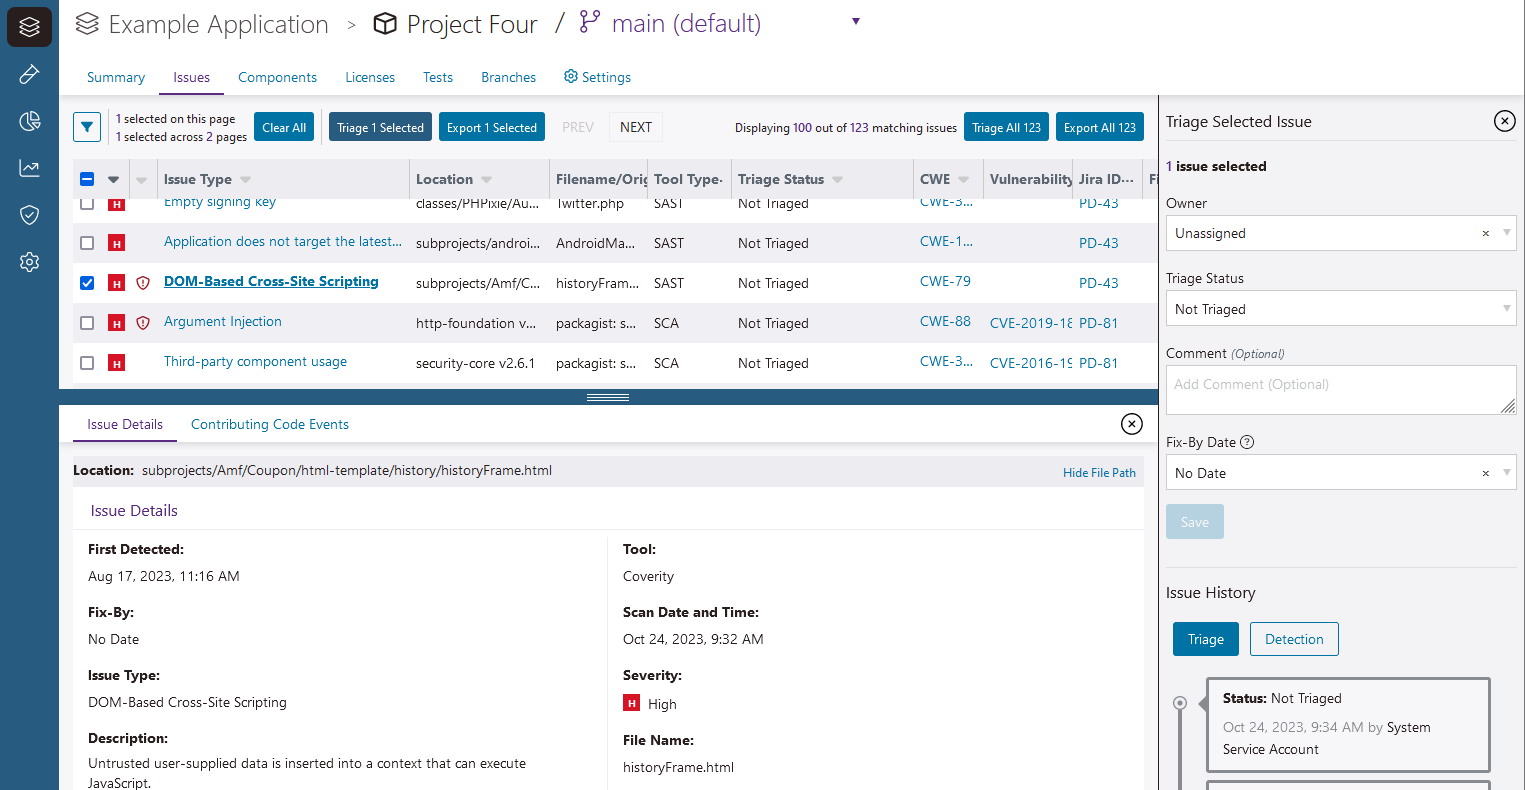
You might decide to review an issue independently to decide whether to dismiss it. In such cases, you can triage a single issue from within the issue view.
  1. Select an issue to triage with the checkbox on the left side of the list.
  2. Click Triage Selected.
    The Triage Selected Issue panel opens.

    Screenshot of Individual Issue Triage
    1. (Optional) Use the Owner dropdown menu to assign the issue to yourself or another user with access to the project.
    2. (Optional) Choose a Triage Status from the dropdown menu.
      If you select Dismissed, the Reason for Dismissal dropdown menu appears. Select a dismissal reason.
    3. (Optional) Enter a comment in the text box that explains the reason for the status you chose.
      This is optional except when Triage Status is Dismissed and Reason for Dismissial is Other.
    4. (Optional) Set, change, or clear the issue's fix-by date.
      • To change the issue's fix-by date, select Specific Date with the Fix-By Date dropdown menu, and then select a date.
        Note: When you manually set or change an issue's fix-by date, the fix-by time is set to 5:00 PM in your local timezone.
      • To clear the issue's fix-by date, select No Date with the Fix-By Date dropdown menu.
  3. Click Save.

Batch triage by manually selecting multiple issues

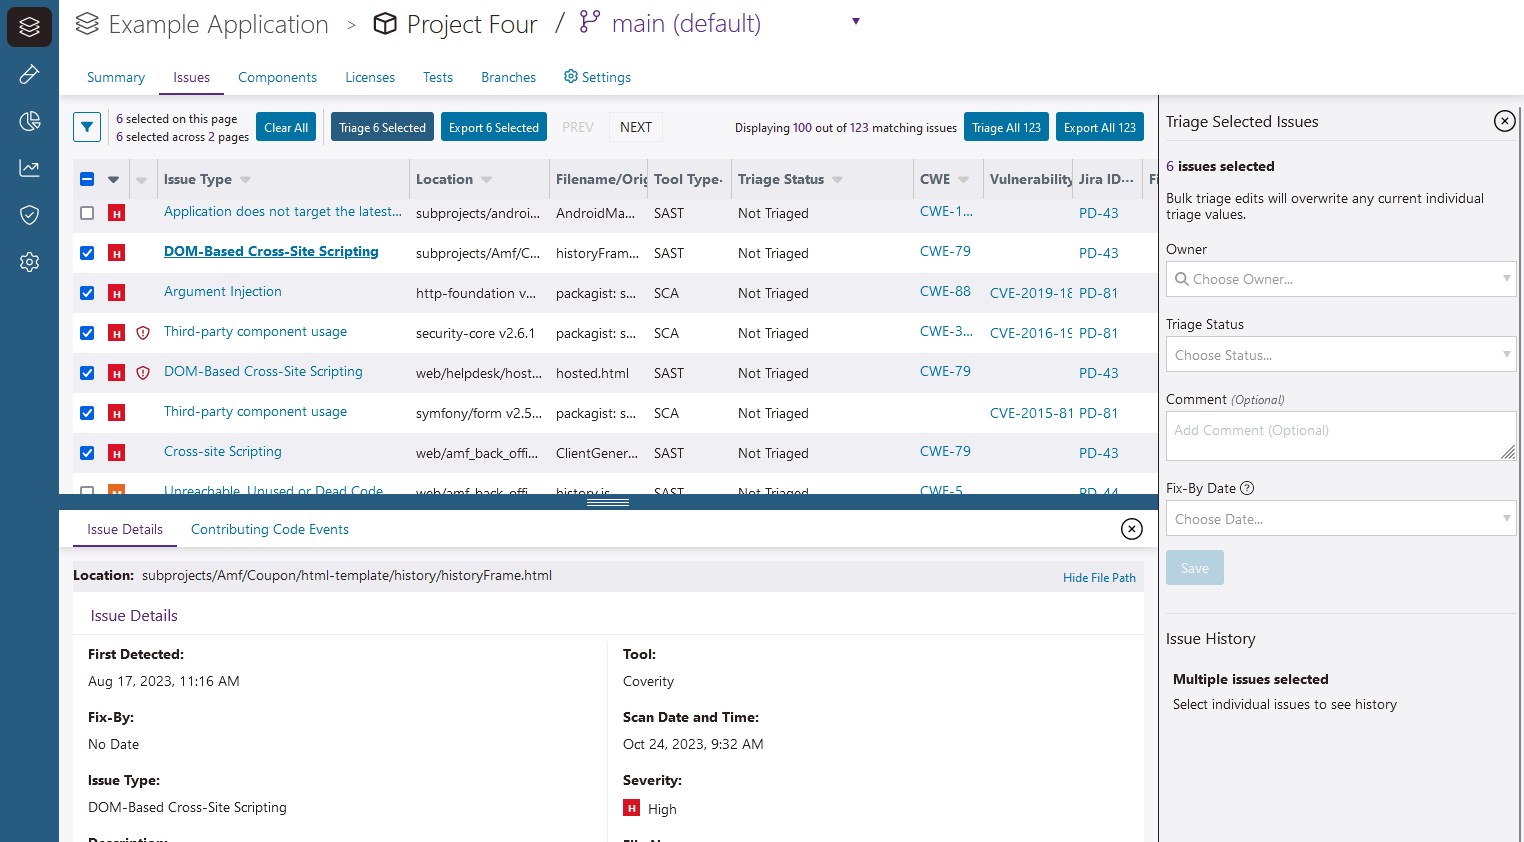
You can triage multiple issues you select manually.
  1. Select issues to triage with the checkboxes on the left side of the list.
  2. Click Triage Selected.
    The Triage Selected Issues panel opens.


    1. (Optional) Use the Owner dropdown menu to assign the issues to yourself or another user with access to the project.
    2. (Optional) Choose a Triage Status from the dropdown menu.
      If you select Dismissed, the Reason for Dismissal dropdown menu appears. Select a dismissal reason.
    3. (Optional) Enter a comment in the text box that explains the reason for the status you chose.
      This is optional except when Triage Status is Dismissed and Reason for Dismissial is Other.
    4. (Optional) Set, change, or clear the issues' fix-by date.
      • To set or change the issues' fix-by date, select Specific Date with the Fix-By Date dropdown menu, and then select a date.
        Note: When you manually set or change an issue's fix-by date, the fix-by time is set to 5:00 PM in your local timezone.
      • To clear the issues' fix-by date, select No Date with the Fix-By Date dropdown menu.
  3. Click Save.
    The triage options you selected are applied to all the issues you selected.

Batch triage by filtering

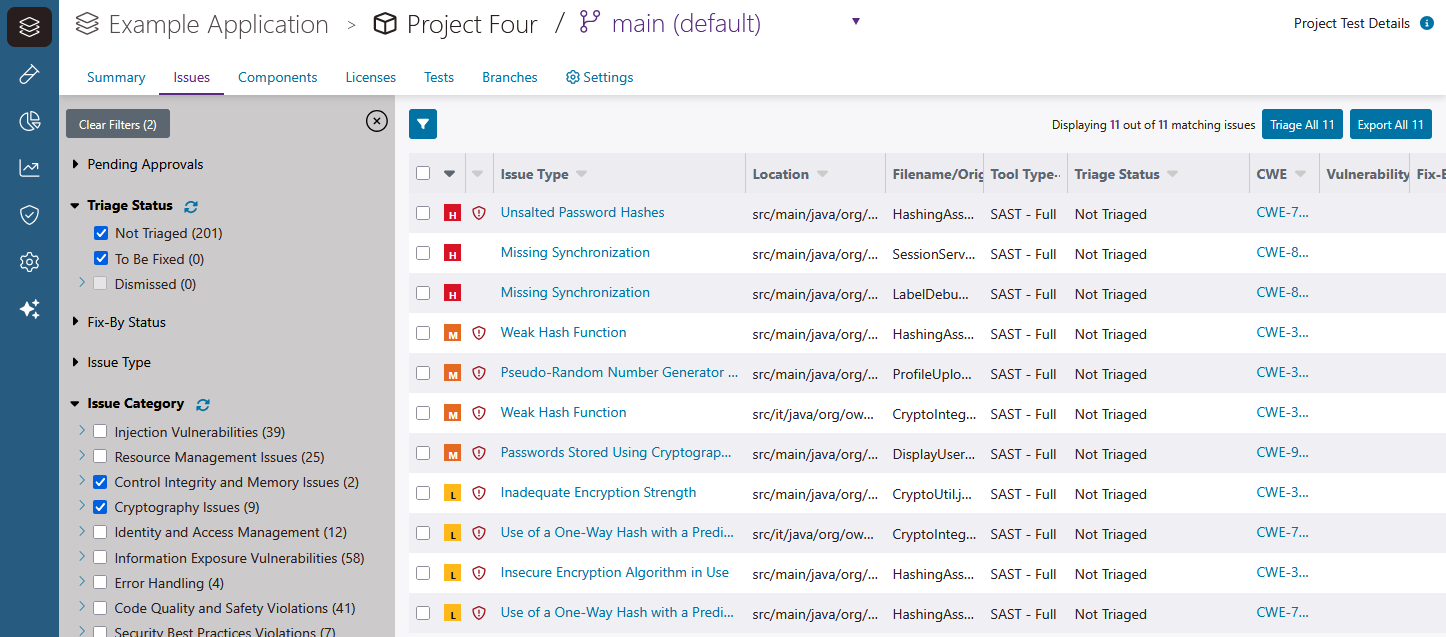
You can triage multiple issues you select with filters.
  1. Apply filters to identify issues to triage:
    1. Click the filter icon.
      The filters panel opens.


    2. Expand filter categories and use the checkboxes to apply filters, as required.
      Tip: The quantity of matching issues appears in parenthesis next to each filter.
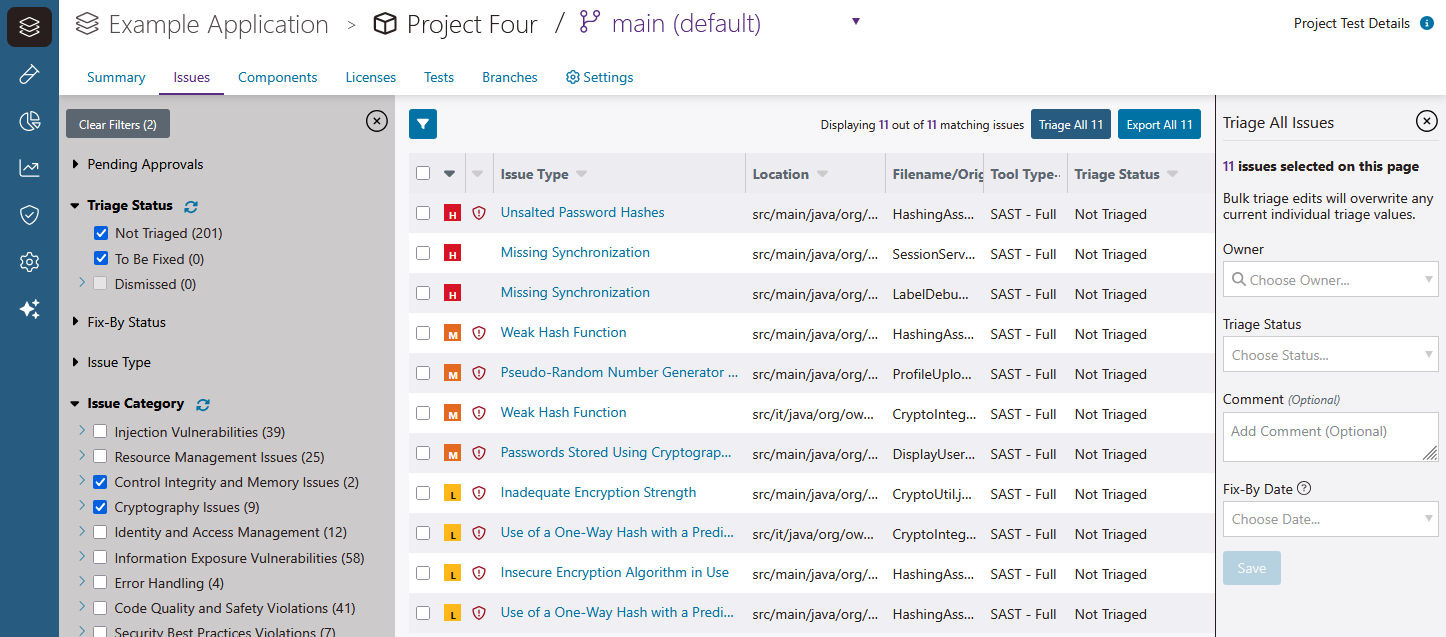
  2. Click Triage All.
    The Triage Selected Issues panel opens.


    1. (Optional) Use the Owner dropdown menu to assign the issue to yourself or another user with access to the project.
    2. (Optional) Choose a Triage Status from the dropdown menu.
      If you select Dismissed, the Reason for Dismissal dropdown menu appears. Select a dismissal reason.
    3. (Optional) Enter a comment in the text box that explains the reason for the status you chose.
      This is optional except when Triage Status is Dismissed and Reason for Dismissial is Other.
    4. (Optional) Set, change, or clear the issues' fix-by date.
      • To set or change the issues' fix-by date, select Specific Date with the Fix-By Date dropdown menu, and then select a date.
        Note: When you manually set or change an issue's fix-by date, the fix-by time is set to 5:00 PM in your local timezone.
      • To clear the issues' fix-by date, select No Date with the Fix-By Date dropdown menu.
  3. Click Save.
    The triage options you selected are applied to all the issues you selected.

Find triage history

Triage events are saved, and can be reviewed later. See View issue history for more information.