Issue tracking integration for Jira
This page describes the issue tracking integration for Jira, and what you need to do to connect Polaris to Jira. Once configured, the issue tracking integration allows Polaris to create tickets in Jira for issues captured in Polaris.
Prerequisites and technical requirements
The issue tracking integration for Jira requires:
- A classic Jira Cloud instance running the latest long term support release.
Important: The Jira instance must be routable over the Internet. Closed networks are not supported at this time. Jira Next-Gen is not supported.
- Only organization administrators can connect Polaris to Jira. The organization administrator who configures the integration must also be a Jira administrator (with permissions to link external applications to Jira).
- Authentication between Jira and Polaris is through OAuth. You will need to create public and private OAuth keys, as described in this article.
Issue fields and attributes
Each ticket Polaris creates in Jira includes the following fields:
- Summary: the format of summaries vary, depending on how the ticket was created:
- Tickets for issues you export manually:
Polaris - Project '<Polaris project name>' contains issue '<Issue Type>' - Tickets created for policy violations:
Polaris - Project '<Polaris project name>' contains issues violating policy '<Policy name>'
- Tickets for issues you export manually:
- Description: the format of descriptions vary, depending on how the ticket was created:
- Tickets for issues you export manually: detailed information about the issue, evidence (DAST issues only), remediation guidance, and helpful links.
- Tickets created for policy violations: the name of the violated policy, the names of any violated rules, and links you can use to view violating issues in Polaris.
- Reporter: The name of the user who configured the integration.
Important: If other fields are required by your Jira project, exports will fail.
Connect Polaris to a Jira instance
- Create public and private RSA Keys
- Link Polaris to Jira with a public key
- Add a Jira instance to Polaris
Important: These tasks can only be completed by an organization administrator who is also a Jira administrator. The same person must complete all of the tasks in this section.
Each one of these tasks is explained in more detail below.
Create public and private RSA Keys
Link Polaris to Jira with a public key
-
Under Integrations, select Application Links.

-
Select Direct application link, enter the URL of your Polaris instance in the Application URL field, and select Next.

Note: If a warning appears, select Continue.The Review Link window opens.
-
Select the options icon
 next to the application link you created for Polaris and then select Edit.
The Configure window opens.
next to the application link you created for Polaris and then select Edit.
The Configure window opens. -
Open the Incoming Authentication tab, and complete the required fields:

- Consumer Key: Enter
OauthKey. - Consumer Name: Enter
Polaris. - Public Key: Copy and paste the public key you created into this field.
Select Save (near the bottom of the form).
- Consumer Key: Enter
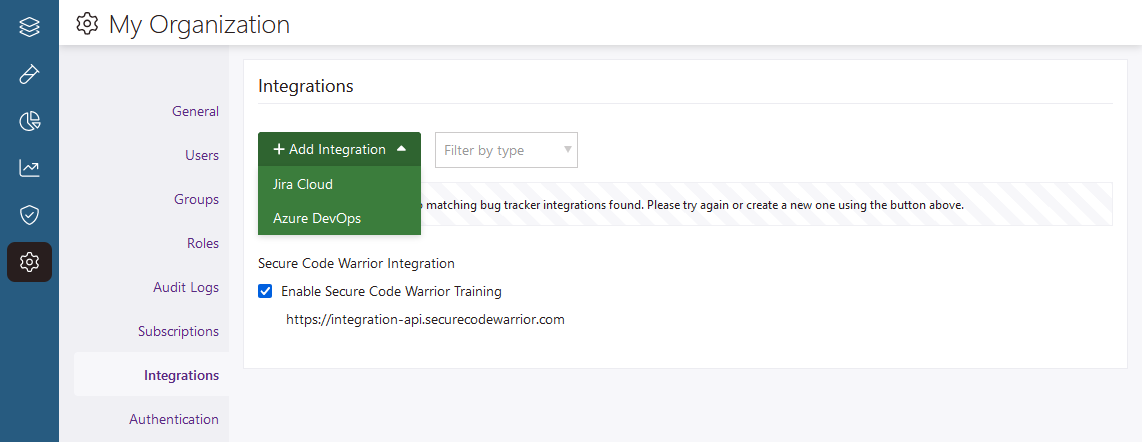
Add a Jira instance to Polaris
Important: These steps can only be completed by the user who connects Polaris to Jira (described in the previous task).
-
Select .
Connect a Polaris project to Jira
-
Under Issue Tracker, select a Jira instance from the Instance dropdown menu.
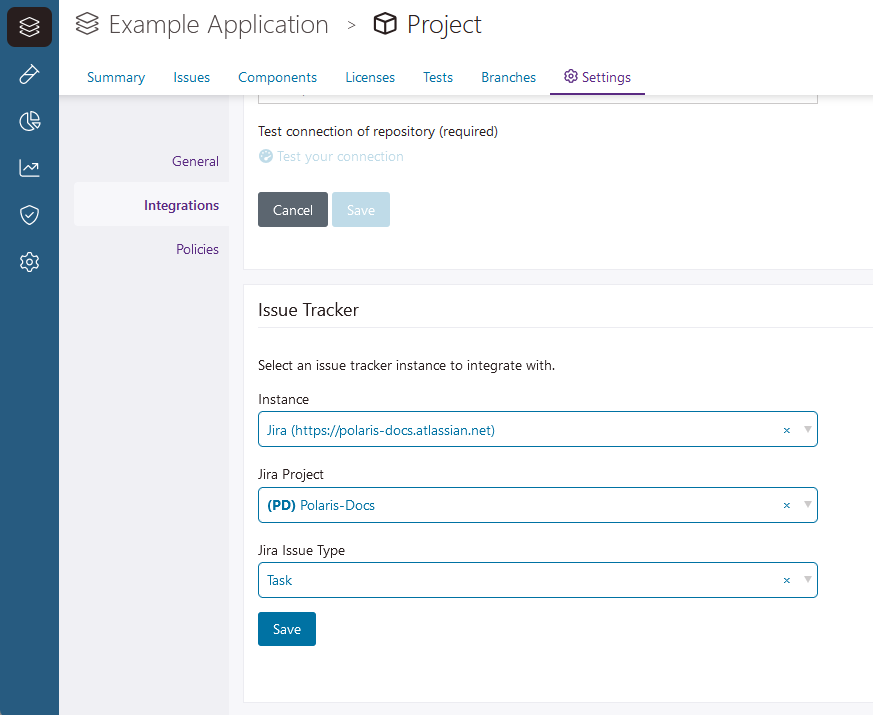
Note: Each Polaris project supports one issue tracking integration. You cannot add an issue tracking integration to a project that already has one configured.